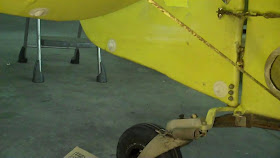
The handle locks by engaging a sort of set screw in the handle. Which I lost when installing. After cleaning, and cleaning, and muttering unkind words, I found that the replacement set screw is not sold singly - I had to buy the whole parking brake assembly. So I did, uninstalled the old new one, and installed the new new one. See the brass thing in the center of the tube the handle goes in? Yeah, you don't want to know how much that little bit of brass cost me in time, money, and aggravation.

Along the way, dealing with the brakes and dealing with firewall cover patch, I finally got to the point that it was just easier to remove the floor to continue work.

These are the old MicroVG's, on top of the repaint kit to replace the entire plane's VG's. The pink stuff on the bottom is dope that came off when I popped them off with a putty knife - they're bonded on well! I may fly the airplane without VG's first, to get a good feel for her original handling characteristics.

While working around the tail feathers, I noted that the last person put flat drain grommets on the tail instead of seaplane scoops, and didn't put a cloth patch on top. That's perfectly fine from an airworthiness standpoint. From a practical one, all but two had since been knocked off by dirt, rocks, weeds, sand, or something. So, I put seaplane grommets on to promote pulling moisture out of the area, and covered them with dollar patches to keep them there. My IA, believing that overkill is always better than barely enough, took the time to point out that I should really put some on the bottom of the rudder to pull moisture out of that as well.

When I bought the plane, the end of one of the placards in the cockpit was held on with duct tape as it had curled away from the instrument panel. As I worked around the cockpit, I bumped into it several times after removing the ossified duct tape, and it finished coming off. Here, it's being properly glued down.

Going over my inspection covers, roughly half of them had been painted without primer, and the paint was peeling off in large flakes or almost entirely gone (Like my fairings). The human eye can see thousands of shades of yellow - matching would be time-consuming and likely fruitless. The only easy-to-get yellow in the shop is a rather awful shade (at least, to my eyes), so I went with the other color on the airplane - flat black.

For another small but good step, the nicely repainted steps are now being wrapped with no-slip tread. Wet paint is slick, and I am sometimes clumsy - this should help prevent bruises and leaking blood. The tape is to keep the tread on securely until the glue cures tightly to the peg.

While none of the projects above move directly toward getting the engine run or wings on, they're things that were very good to get done. I'm not spinning my wheels, no matter what it feel like, and the punch list of things left to do on the plane is growing smaller and smaller.
Ah... the dreaded punch list... ANY item(s) removed from it are progress, no matter how small. Keep up the good work!
ReplyDelete