
Working on the engine side is a little tight on space. Here, I'm removing the hose that leads from gascolator to the fitting through the firewall. Let's step back to the shutoff valves - after finding replacement O-rings, I cleaned them up, polished the valve cores and bodies, greased things well with fuel lube, and... found they stuck when I tried to turn the valves. So, more polishing, followed by careful checking with a sharpie (coating the core, and seeing where it rubbed off the core and on the body to catch the burrs and high points on both), followed by careful work with jeweler's files, lather rinse repeat. This worked for two out of three fuel valves.

Two out of three ain't bad for Meatloaf, but it's a show-stopper for fuel shutoff in a plane. Would you believe that Imperial valves stopped making the replacement valve I need for my main fuel tank shutoff... 40 years ago? There is a PMA replacement on the market, so after two days of working with the main tank valve only declare that it was not ressurectable, I got the replacement. Unfortunately, it's not a one-to-one replacement, and there are no unimportant details. A new shape - straight down instead of bent over 90 degrees - means the fuel shutoff control arm is now too long, the valve is now in greater danger of being kicked by wayward [trainee] feet, and the output is now too low for the old firewall fitting and hose.
The new valve also came with a fuel filter that stuck far up into the tank. This is great for most fuel tanks, but has a severe clearance problem with the odd float contraption that measures my fuel quantity and its supports. So, my IA did some math on the maximum flow through the valve, the area of each hole in the filter, and came up with the number of filter holes needed. The small nub of fuel filter sticking out of the section that's about to be put on is still serious overkill. That's fine by me. It's more than three times the hole area needed, which means a lot of paint chips, dirt, or other debris could get in and I'd still be safe to fly.
By the way, if you're looking at the old valve and wondering why it has no filter... yeah, I'd like to ask the guy who put that in, lo those many decades ago, about that too. Unfortunately, he's probably no longer alive even if I could find him - and he'd probably tartly point out that it's run fine all these years without it, so what's my problem?

The blue out-of-focus thing below the big gaping hole is the new hole I drilled, to accomodate the new fitting. We're switching from soft hose to rigid tubing for several reasons. On the cockpit side of the firewall, the rigid tubing will run from the PMA'd shutoff valve to the firewall fitting that's solidly in there to provide extra support for the surprising yet inevitable day some oaf doesn't watch where he's put his feet - this will make it much less likely said oaf will manage to kick the fuel valve off the bottom of the fuel tank.

We should have that wrapped up in a few days.
On to the fabric - you didn't think I was done with that just because the wings are off at the paint shop, did you? Getting under the tailfeathers to look at the joints and lubricate places back there, I noted that the old leather patches which protect the fabric from being ripped where the rudder cables come out of the fuselage had given up the ghost.

So, time to try to gently remove the last clinging bits of leather without removing too much dope. The rudder cables are loose and sans turnbuckle because the rudder control horn had an unacceptable amount of slop, as the holes had wallowed out. I drilled the holes back to round, and my IA is fabricating spacers to provide support while retaining the original size hardware. That's as good a time as any to clean and examine the turnbuckles - I hope I don't end up running new rudder cables, too. They look good so far!
While under there, and there was no way to take a good picture of this, I noticed that almost every last drain grommet had come off - the last person to cover the tailfeathers had used flat washers, and provided no fabric patch over the drain grommet. Back to the parts store to buy another bag of seaplane grommets, and after cleaning dirt and dust off the tailfeathers, they're super-seamed on. I cut out smaller fabric patches to dope on tomorrow, so these will not get knocked loose by mud, dust, or gravel.
I also have to make up my mind if I'm ordering the replacement MicroVG kit, and putting it on the wings (and fixing a few missing ones on the tailfeathers), or taking them all off and removing the STC. On the one hand, the vortex generators do really nifty things for pushing the edge of the envelope. On the other hand, if I don't have them on, I'll get a true, honest, clean feel for what my airplane can do, and when the design wants to stall and how. On the other hand, she's already so modified... On the gripping hand, it's more money, more time, and I want to get her airworthy and flown, then pickled for winter so I can go home to my husband. The debate will continue until I pick a firm decision or time forces the choice.
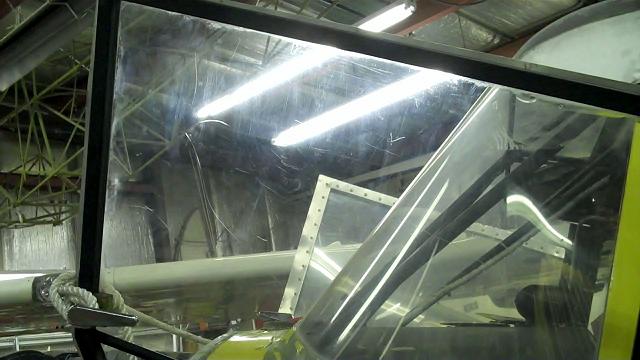
While the last owner did not have tapes over the windows, I wanted to put them back on. Tapes over the windows not only protect the screws that hold the windows in place, they also reduce the amount of wind and water that get forced under the plexiglass, keeping the cockpit dryer, calmer, quieter, and warmer. As I'm still learning, and windows are things that get replaced fairly frequently, I tried two separate styles based on what I saw out on the ramp for securing windows. This is the prettier of the two - I'll either do an even better version of this the next time I replace windows, or I'll try something else. Either way, it works. Today, I put the second coat of dope on with a brush, and tomorrow I'll do the silver coat. As I'm brushing it on, it'll look awful compared to a sprayer. On the other hand, I can't spray in here, it's too cold to spray outside, and the windows are now weatherproofed. I do what I can with what I have.

Today, with some downtime, I also cleaned the doors to see how much of the haze was dirt and how much was the many microscratches. A good portion was from years of dust and glacial silt - but a lot of it was from the wind-whipped abrasion. This is a washed, but still scratched-up, door.

This is a door that has been buffed with a coat of Novus 2, not with any great skill, nor rinsed off afterwards. The results are impressive enough I'll pick another slow time (read, another time I really don't want to dope fabric), and do the other door before starting on a second round.
The windshield will wait until spring - I want to flood it with water to softly wash off all abrasive particles. Doors are a pain to replace but not critical to the safety of flight - windshields are a major rebuild, and a major pain to hand-fit.
Not pictured - parts picked up today included two door locks to help hold the doors in, and a new parking brake handle, cable, and housing. The last handle was eagerly identified by an enthusiast of such things as an "Original World War Two Army Jeep Throttle!" ...Well, yeah, they were building Army Jeeps in 1941, too, building up to the inevitable entry to the war raging across Europe. There was no such thing as an "aviation parts industry" back then, and parts were sourced from wherever they could be found.
I'm just lucky my airplane is not the deluxe model, nor am I trying to restore her to original glory - the door handles on those were sourced from the nearby Packard plant. Try finding one of those for a reasonable price today!
Re: Novus 2: I've got a ventilated helmet that I use when woodturning strange tropical woods, and the faceshield has gotten scratched from me dropping it on the floor a few times.
ReplyDeleteIt seems that the microscratches should be polishable, but I've not been sure what to use. I did an experiment with some green and red rouges on a cotton wheel (usually used for polishing shellac finishes on wood) and had meh results.
Does Novus 2 sound like the right tool for this job?
Nice report, and GOOD attention to detail Wing. It's always the little things that end up screwing us up... Keep it up and you'll be home with Peter before you know it!
ReplyDeleteTJIC - if it's glass, then no. If it's lexan or plexiglass, then yes, Novus 2 will work well for the microscratches and Novus 3 for the major ones. You could use Novus 1 to keep it clean, or go for the much less expensive yet works just as well Pledge. Pledge even has a nifty lemon scent.
ReplyDeleteNot only have I seen Novus used on aircraft windows, I have also helped a customer calculate how much would be needed to refinish a plexiglass tank at the sealife center - you can well imagine that was more volume than a little pilot shop was used to selling!
NFO - thanks. :-) I'm learning to love and hate the phrase "There are no unimportant details."
Wing, that is why the 'favorite' saying in aviation is - Attention to Detail, if you don't your chances of survival become inversely proportional!
ReplyDelete